|
"The following is an excerpt from a friendly email correspondence with Jack Troy about the February 2024 firing of the BelugaGama: "Good evening Jack, thank you for the heads up with the square shelves. They were protected so hoping they perform well :-) I'll take even better care to keep them dry from this point on. Thank you for checking in about the firing as well. The experience was majestic. A couple changes yielded improvements in the firing experience. We had an assortment of fresh green hardwood, semi-dry and fully seasoned hardwood to select from throughout the firing. We burned through about a cord and a half of green hardwood. We blended pine in as we attained top temps. We also pulled from the dry hardwood toward the end as needed. It was nice to have a selection and we used at least 60% green hardwood throughout the firing. One big change was that once we pulled the active damper after body reduction, we immediately pulled all the passive dampers from the back of the chimney and cruised up smoothly, with back pressure, steadily to cone 11 down on the afternoon of the second day of the firing proper... (We preheated for 3 days burning large log rounds). We then held in the 2200 to 2250 range for 24 hours. Finishing Stoke series: The ember bed burned down to just a few inches near the end of the firing so I performed a series of heavy stokes over the course of 45 minutes to build the ember bed up. Once the embers were mature with a bright yellow white glow...a large final stoke and we shut the air down completely in front. The kiln wafted from 2330 to 2358 over the course of less than 5 minutes. We mudded up the kiln completely and then closed the active damper. Cone 12 wound up halfway down at the side center of the kiln. The pyrometer probe was to the backside of the side-door about a third of the way up from the floor. So I'm sensing that we had plenty of good atmosphere and heat throughout the chamber. Steve and I ran the reduction-cool sequence for about 12 hours to 1600.... 9 minute cycles of 5- 1.5" square by 16" Green hardwood and that went smoothly. I was so thankful and delighted to have experienced a smooth cruise throughout the firing. Although I didn't share a comprehensive firing plan this time I chose rather to oversee each shift and set goals directly with the stoke crews for their 8 hour shifts throughout the firing. That worked out well as we ended up shaving 24 hours off what I had planned for the firing and saved a cord of hardwood which was nice. It was a major breakthrough to pay particular attention to the ember bed and air settings during that final Stoke series. We've experienced the kiln wafting up in temperature at the end in the past and finally I feel as though I have my head around that process and can plan for it and anticipate the outcome in the future. We also put extra effort and energy into our preparations and that paid off for sure :-) The two weeks preceding the load up day were spent grinding shelves, cleaning up the kiln area cleaning up the interior of the kiln etc. Some of those things are oftentimes left for the morning of the load up day which basically just delays the actual commencement of the loading process. I'm hoping Wednesday's unload reflects our experience... The pots usually do. I appreciate you reaching out Jack and will send you a picture of your piece in its new home as a part of this email. Take care, Trev" Since posting the above information, we've unloaded the #BelugaGama. Unload shots below. A couple takeaways upon reflecting a bit on the actual pieces. I made up a bunch of faux scallop shells using a mix of 50/50 plaster of paris and CaO. Turns out, as we fired to cone 13ish in the front, the mix needs to be adjusted for the next go around. The shells dissolved and no "shell markings" appeared. I could be mistaken as the pieces need to be soaked...but no evidence of natural ash glaze taking on the shape of shell and leaving, what appears to be, a glass shell on the surface of pieces. My bad for risking it all on a bunch of works...I see it as an opportunity to readdress the forms that were lost and improve our practice with working knowledge of what works and what doesn't. So many simple steps and breakthrough in understanding add up to a successful finished product ;) The shut down procedure was quite special...I took the lead at the finale' and built up a fresh deep ember bed (16" at least)...then stoked to the cieling with fresh hardwood. The kiln was then sealed off completely at the front. The temps wafted up from 2330 to 2358 at the center-side of the kiln. This is a phenomena that I've witnessed several times and can now say that I understand the kiln's response and look forward to implementing this high temp finishing technique in the future. Like many things in life/wood-firing...this is most likely a common practice for many potters...it's just that it was a discovery through experience for me ;) I'm open to feedback if you are interested in reaching out. Best, Trev"  Hey Folks,
We just wrapped firing number six of the #BelugaGama. There were a few new things going on with this firing that I feel are worth sharing. Chimney: We mudded the chimney base up to a newly installed active damper which is just above the corbleled section of the chimney....for down-firing. Huge increase in draft control. The active damper slot was left open throughout the firing and closed upon starting the redux cool sequence. For the first couple days of the firing, we kept the in-chamber active damper closed about 75%...that is once we started ramping up from around 300 degrees (we did a two and a half day pre-heat with active dampers open and passives closed). Full draw was used in the pre-heat...active damper open and passives closed. Once we hit the "wall" at 2150ish...pulled the in-chamber actives and opened the passives on the back side of the chimney. Backpressure was maintained until then using the in-chamber active damper and was nearly replicated, with a slight loss of backpressure, when the passives were pulled. The kiln stopped consuming wood like a hungry teenager at that point...we burned through 2 cords of hardwood up until that point. One more cord brought us to top temps a day and a half later. It was a breakthrough to figure this method/draft-change out for sure. Finally, backpressure and temp maintenance/gain happened w/o a struggle ;) We used a blend of Rock Maple, Ash and Fir this time around. The Fir, along with pretty dry wood, created a scenario where clinkers were no issue in the below grate section of the firebox. All in all, a smooth firing. Down-Firing: Steve Johnson ran the down-firing sequence...Kiichi Takeuchi and I helped. 5 minute redux burn followed by 3 minute clean out periods down to 1600....12 hours total. We're hoping for awesome results but have already taken steps forward in understanding and controlling the kiln atmosphere and temperature rise. I'll post pics of the results in a couple days. I'm hoping some of this info is interesting to some of you out there. All my Best, Trev  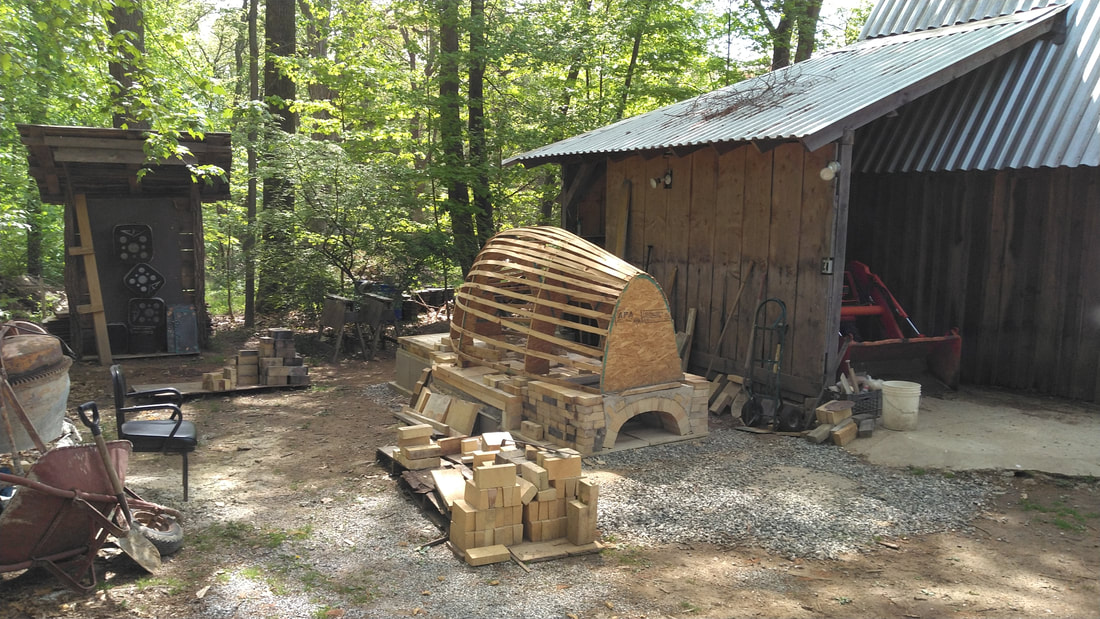 Over the last couple months, things have changed. A smaller kiln is in the works. Smaller everything...amounts of wood, firing time, firing crew, prep time in general. Quick turnaround....versatility will be a bonus! Fortunately, my friend and fellow potter, Stephen Rodriguez, has accrued a hefty stock of both soft and hard bricks over his thirty years or so of gas kiln building experience. Between his bricks and fellow potter, Louise Harter's 1000+ Empires, a small kiln may be ready to fire in the next 4-6 weeks. We've nearly completed the base layer of the kiln. To begin with, the pad was excavated to level, layered with 3/4" gravel and a cinder block base was laid dry....two high/18'. Then we layered the top of the cinder block base with 1/2" cement board. Building a 2x4" frame, we cast the slab using a mixture of cement, 1/2" gravel, plenty of perlite and sand. A pure concrete slab 3:2:1 Gravel/Sand/Cement was cast for the chimney base slab. The firebox floor was cast in a heavier perlite ratio than the chamber slab. We then cut and fit high alumina 5/4" shelves for the floor of the firebox and layered the chamber floor with 12x18" soft brick lintels. For the firebox arch, Stephen free-styled a sprung arch curve, I traced and created a form using plywood and a jigsaw. We cast the firebox grates with Mizzou castale and are now in the process of, having placed hard brick lintels around the permanent shelf posts, cutting and fitting hard bricks around the newly places hard brick 12x18" lintels. The form for the kiln chamber is a graduated 1:1 catenary arch. The interior opens up to the center section and tapers to the tail...a 1:1 ratio is maintained throughout the chamber. It was made from plywood cut to a gravity-formed archs and bound by 1/4"x10' strips of Ash. The chimney will be 36x36" on the exterior to 6' height and corbel to a 14" square opening to 13'. The firebox is roughly 1/3 or the chamber floor area. Stacking depth is 6.5' with an average height/width of 42". Stackig space will be approximately 60c.f.. There's a lot of work left yet but we've taken care to make a solid base for the kiln. The firebox has 3-3x36' grate slits and they are divided by the 9" depth of the castable grate. Hoping to fire in the next couple months..this summer for sure ;) Volume Math: A 1:1 catenary arch has the equivalent of exactly 2/3 the area of a 1:1 square of the same dimension. 42" average height and width equals 1764square inches/inch. 1764x12= 21,168"/foot. 1 cubic foot =1728 21,168/1728=12.25 cubic feet of stacking per foot. 6.5' chamber length x 12.25 cubic feet stacking per foot of chamber=79.625 At least 75 cubic feet of stacking will be available. 7 chordsThe winter firing was a step into a new realm. The elusive chocolate flashing emerged as a predominant kiln effect this time around. Copper fuming was a complete surprise and a new direction of exploration for sure. A large Oribe green glaze...stacked up high in the front of the chamber provided volatilized copper to a number of pieces to the rear...gold and copper sheens developed on the raw surfaces of porcelaneous stonewares and porcelains. the changes made this time around include: Stacking the front two rows with extra room above the pots...shelves in line re: stack height...allows better combustion and ash migration to the center/rear. We fired with green wood included in each stoke all the way up to the last couple hours of the firing. We used large split chord wood 5-7" split diameter. 2-3 heaping wheel barrows per stoke...every 20-30 minutes. Louise ran the overnight before the final day and stoked lightly with dry thinner wood to get cone 10 to start going over...this was a good prelude to a intense finish. We loosened up the back a bit...still a little tight...but the back pressure throughout the firing created a beautiful color palette. The long and extreme stoke cycles were key here...so much depth in the surfaces...the green wood really brightened the colors throughout the kiln. Although there a number of dry pots around the tail...the kiln effects by far outweighed the losses...metallic asteroid blues with crystals and fumed glosses...oranges to chocolates...I'm so thankful and humbled by the beauty that can be attained through this process. Cannot wait to fire again in June. This firing was kinda slipped in as we had the majority of the wood split and there was half a kiln worth of pottery bisqued and ready...we had an over abundance of pieces that I held on to, from June, for the following firing. Aside from the aforementioned changes, the firebox was modified...no pieces on the floor except to the very back wall. Shut down procedure...approaching the finale'...I shut down the air in front and fed small sticks in to raise the temp( at center) to 2250...shut down included 3-4 full wheel barrows.. enough to fill the firebox to the top...the stoke door was blocked with wood. Exit flue dampers were then closed and all air inlets were stuffed with kaowool. Green was mixed in to the final stoke. 7 chords total, mixed hard wood and 1.5 of green oak. This process never stops teaching and rewarding ;) This June's firing was a mixed bag to the extreme!
Large pieces along the top of the kiln were covered in ash and responded beautifully....Mackenzie Shino with Redart, Raw Hawthorn Fireclay body and Blue Oribe thrived in the kiln's environment. The tail was stacked a bit too tightly this time around...I have a clear idea of the results as they relate to temperature and surface effects....cannot wait for the next one which will be sooner than later. We've been on a once a year firing schedule the last three firings and feeling the need to ramp up timing with next one...there's plenty of unfired student, fellow potter and personal work...enough the fill the kiln again and more....plus, we have the wood split and cured. Thinking of simplifying the firing process this time around...I've invited various artists to participate and take ownership in different aspects of the process and I'm sensing that it's time to re-engage with the oversight and direction of namely the tail stack and final shift. I've been inviting folks from the surrounding community and region to participate in the firing activities with the intention of connecting with both the established surrounding clay community and local residents that are completely new to the process. The community building aspect is important to me....the most important aspect...I believe that the quality of the work reflects the approach to the process and by incorporating others...new information and insight is gained...furthering the end quality of the work. Next firing: skeleton crew and very small social gathering for the finnale'. Back to basics ;) This summer's firing was what I view to be our best firing ever. I say this because the overall quality of the pieces was so varied and beautiful. The success rate was in the high 90's and I couldn't be happier with the level of quality. The results reflect the effort we've put in as a team of wood-fire potters. The crew is evolving to comprise more professional potters than former students...a progression I hadn't anticipated but welcome. Former students are absolutely still a factor...just nice to be working with potters that are fully committed to the craft.
The difference this time around had a lot to do with the stack. More pieces than ever before were packed into the kiln. We've added a second firebox to one side at the center of the chamber...it's 2' deep and 18x18" high and wide. Because we packed the kiln super tight...the secondary firebox aka the Nos....didn't have the jet fuel effect this time around regarding temp gain but the flashing to the back side was amazing. Blown away by the effects of wood and atmosphere. We're in a new chapter and could not be more thankful for the people that contribute! Next time around, more porcelain and bigger pieces.. Looking forward to the next big fire summer 2019. I'm thinking this is our best firing yet. Had a lot to do with the preparedness and crew for sure. A good group of folks stoking and ample wood split, seasoned and stacked for efficient working. A big change in the stack involved a secondary firebox in the bottom center on one side. This was huge in that the flames were given a chance to completely combust...nice glaze melt and ash deposits toward the tail. This firing yeilded great results that are featured on the summer 2016 unload page.
The December firing was a good one. 3 days total.
We fired through five chords of mixed wood; pine, mulberry, black locust, maple and honey locust. We saved a stock pile of honey locust for the finish. Turns out that we fire with a different mix of woods each firing; and each wood has particular burn characteristics. It does make things a bit tricky...especially when a new wood is introduced. We had never fired with honey locust before; but I had noticed that its heat index is very high and we were thrilled to have a good bit of it (1.5 chords) to bring the kiln chamber to it's max temp. What happened baffled us for a bit. There was low pressure over the kiln for the last day and the honey locust embers built up both in the firebox and below the firebox something fierce. We tried to increase the draft by plugging passive dampers in the flue, opened up the ember box to max air, altered stoke patterns...nothing would get temp to the back of the kiln. Would have been nice to have a chord of thin-split pine for that! Next time for sure and from now on. The front and middle hit cone 10 plus and the few pieces we've pulled already show spectacular results. At the end, the near white heat indicated plenty of temp. There may be a few re-fires this time but from what we can see so far, the atmosphere of super heavy reduction was good for shino crystalization and flashing...we've seen some beautiful chocolate flashing on several different clay bodies. Can't wait to get at the rest! Stephen Rodriguez shared a couple new glaze recipes with me for this firing and I'll post them once we've seen the overall results. Will continue this post after the unload. This firing was special in many ways. First of all, a great friend of mine, Michael Strand, came out to participate in the event. His presence was awesome as he has fired anagama kilns all over the world and is a world-class teacher, potter and activist.
Several other potters visited the firing as well...Stephen Rodriques of New Haven, CT. Mark Potter and Louise Harder and Kristen Muller also partook in the festivities. For me, the best part of visiting potters was the exchange of ideas and forging of friendships. I learned more this past firing than ever before...or so it seems. Mostly, the feeling of being a part of an inclusive group of clay enthusiasts was thrilling to me. Former students took a larger role in the firing of the kiln. Michael suggested I give even more responsibility to these folks as they have proven their commitment to the process. That'd be great, especially since my two little ones are requiring ever more parental focus as time wears on. Regarding the firing itself, we packed it fuller than ever. The results were stunning in most of the kiln. Although the tail was packed a bit tight and we had trouble reaching max temp in that section. Always lessons to be learned...but some spectacular results. Next time, will fire a bit faster...3.5 days for this one...next fire, Dec. 2015, will be 2.5 days with a high temp hold for 24 hours. Will stack looser throughout and create some open channels for flame and some tightly stacked sections to create micro-climates. There'll be a larger percentage of 25 lb. plus pieces in the kiln too..looking forward to seeing broader surfaces and their variations. The firing is slated to finish up New Year's Eve...so should be a fun finale'. Best, Trev |
